
Thinking back to the first interview I had to transcribe, which was probably 15 years ago now, I believe I played the recording back at half speed—maybe slower—and typed every single word by hand.
It made me want to never interview anyone again. But you kids these days have it easy, thanks to cloud services and artificial intelligence.
Well: easier. It’s still not perfect; but, man, has it gotten better. And if you’re already paying for Microsoft Office (formally known these days as Microsoft 365), you’ve got access to the very good, very easy-to-use transcription tool built right into Microsoft Word. Here’s how it works.
Create a new Word document
Now, this feature works in both the online version of Word found at Office.com or in the stand-alone Word app, so fire up either one of those and create a new document. Unfortunately, it doesn’t work with the free version of Office.
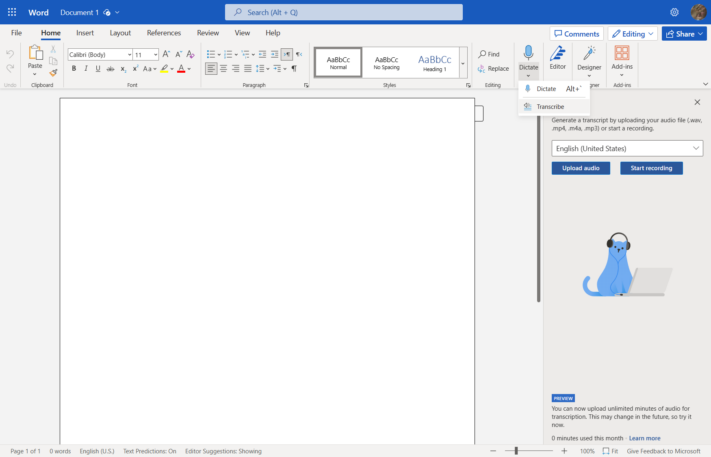
Once you’ve got your new document open, in the Home menu, look for the Dictate feature, which should be over toward the right-hand side. Click the little downward-facing caret to open up the sub-menu and choose Transcribe.
Upload your audio
From here, you can upload your recording—or, if you’re feeling especially ambitious, you can start a recording on the fly.
At the moment, Microsoft is offering unlimited transcription minutes, which is quite a boon if you have a bunch of audio that needs to be converted to text.

This process can take a few seconds to several minutes depending on the length of the recording you’ve uploaded.
Edit the transcription
Once the recording has processed, you’ll have a reasonably accurate transcription in the right-hand sidebar.

At this point, you can go play through the recording right from the sidebar and correct any errors. You can also identify who’s speaking when, and apply their names to their respective quotes.
Add the transcription to the document
Once you’ve edited the transcription, click the “Add to document” button at the bottom of the right-hand pane.
You’ll have four options here: just text; with speakers; with time stamps; with speakers and time stamps.

In most cases, the “with speakers” option results in the standard interview-style text that we’re used to seeing in articles, but play around with the other options and see which one suits your needs best.
Recognize your brand’s excellence by applying to this year’s Brands That Matter Awards before the final deadline, June 7.
Sign up for Brands That Matter notifications here.
