Sure, you spend most of the day with Gmail open in a browser tab. But have you ever really taken a good, long look under the hood? There are settings galore, some of which you’ll never touch, and others that are truly useful. Here’s a quick look at some of the useful ones.
To turn them on, we’ll need to muck about in the Gmail settings menu. To get there, click the little gear icon in the upper-right corner of the interface and then select “Settings” from the menu options.
1. Lengthen Undo Send’s time limit
You’ve fired off a blisteringly hot email lambasting a friend, family member, or co-worker. We’ve all done it. And right when you hit send, you regret it. Thankfully, Gmail’s Undo Send feature does just what it says: lets you undo the sending of a message before it actually goes anywhere. The default cancellation time is five seconds, but you can ratchet your cool-off period all the way up to 30 seconds. It’s the fourth option down under the General tab.
2. Reply all as default
Located just underneath the Undo Send setting above is the option to automatically reply all to group conversations. It’s a good choice if you’re constantly forgetting to include everyone, but be careful you don’t accidentally reply all when you mean to reply to just one person. Good thing there’s the Undo Send option, eh?
3. Get organized with stars
Sure, you can star important messages for later. But the default is a single yellow star unless you change the Stars setting, which is located about halfway down in the General tab.
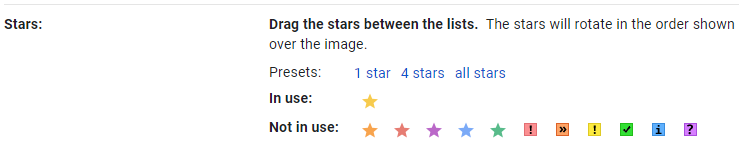
You can choose one star, four stars, or all stars and then the next time you star a message, clicking the star again and again will cycle through all the available colors. This also gives you the particularly handy ability to mark messages with an exclamation point, check mark, question mark, and more.
4. Auto-forward messages to another person
If you find yourself constantly forwarding the same types of messages to someone, look to automate the job by combining auto-forwarding with a filter.
First, under the Forwarding and POP/IMAP tab, click the “Add a forwarding address” button in the first section. From there, enter the email address of the person you wish to receive messages. It’ll need to be verified on the other end, but once it’s verified, you can either select the option to forward all mail, or you can click the “creating a filter!” link underneath the “Add a forwarding address” button if you’d like to filter only certain messages.
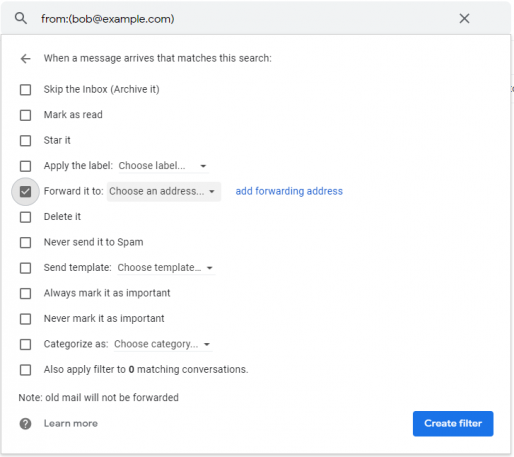
From the filter box that pops up, let’s say you want to automatically forward all messages sent by Bob@Example.com. Enter Bob@Example.com on the “From” line and click “Create filter” at the bottom of the window. Then on the next page, check the “Forward it to:” option and select the forwarding destination you created earlier. Once that’s all set, click the big blue “Create filter” button and watch as future messages from Bob get whisked along to your designated email buddy.
5. Create your own keyboard shortcuts
If you’re a Gmail power user, you already know about the service’s many, many handy keyboard shortcuts. But did you know you can customize the keystrokes? Under the Advanced tab, enable the “Custom keyboard shortcuts” setting and click the Save Changes button. Once Gmail reloads, head back into the Settings menu, and you’ll notice a new Keyboard Shortcuts item on the far-right side. Click that, and explore the gigantic list of default shortcuts, each of which now has an “or” entry that you can customize with alternate keystrokes.
6. Delegate email to your assistant
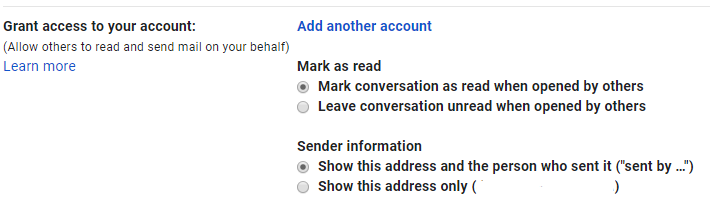
If you’re fortunate enough to have hired help, you can grant access to your Gmail account without giving up your login credentials. Under the Accounts and Import tab, second from the bottom, select “Add another account” from the “Grant access to your account” setting. Enter your assistant’s email address to get things set up, and then decide how you want to handle messages read and sent on your behalf.
Recognize your brand’s excellence by applying to this year’s Brands That Matter Awards before the early-rate deadline, May 3.
