
It took a worldwide pandemic to make me realize that the Aamoth household was woefully short on Chromebooks. With the kids shifting to online learning and e-tailers’ shipping times stretching multiple weeks out into the uncertain future, something had to be done.
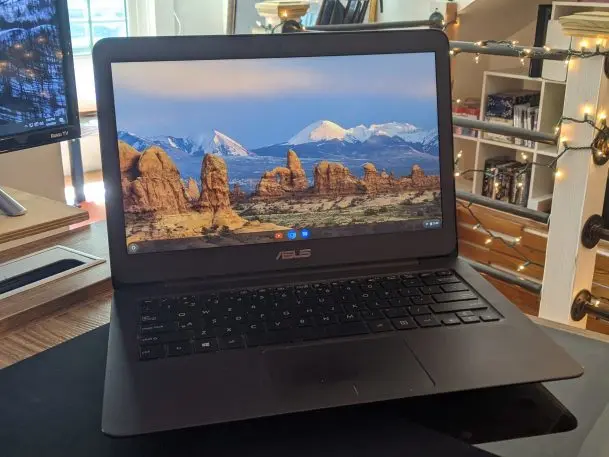
That’s when my beautiful, svelte Asus Zenbook caught my eye. It was a great Windows machine in 2015 (see my original review from way back when). Today, it would run Windows sluggishly. But it would make a dynamite Chromebook: excellent portability and lots of RAM being the two main selling points.
So join me, friends, as we walk through how to turn a spare laptop into a kid-friendly Chromebook, a spare machine for the couch, or just a fun project to keep you occupied. You’ll need about an hour of time, an 8- or 16-gigabyte USB stick, a computer from the past decade-ish or so (PC or Mac), and at least some comfort level with computers.
Much of the process is pretty simple. The trickiest parts are creating a bootable USB stick and the possibility that you’ll have to muck around with your machine’s boot settings to get it to read the USB stick on startup. If that doesn’t sound too painful, then let’s keep going.
1. Back it up and download your new OS
Following the steps below nukes your copy of Windows or MacOS and all your files, so if you’ve got anything worth saving on that old laptop of yours, back it up! I shuttled a handful of documents, music, and video files to my Google Drive account before I got started.
Once that’s done, it’s time to download some software. We’ll be using Neverware’s excellent and free CloudReady: Home Edition, which is based on the same open-source Chromium OS that’s the basis of Google’s Chrome OS as used on store-bought Chromebooks (more info here).

Preferably from a Windows computer, head to this page and click the “Download USB Maker” button. Even if you’re going to install this on a Mac, you can still create the USB Maker on a PC. You can also create an installer manually on a Mac or Chromebook—just follow the instructions in the right-hand column.
2. Create the bootable USB stick
Insert your USB stick and launch the USB Maker you just downloaded, at which point it’ll pull down the necessary files to build the operating system. Give it about 20 minutes or so: Mine took a while even on a fast connection. While you’re waiting, Neverware provides a list of devices that the company has tested to work with CloudReady. But don’t worry if yours isn’t on there (mine wasn’t). If you bought the computer during the Obama administration or later, give it a whirl.

Once that process has completed, you should have yourself a bootable USB stick. The idea is to put the USB stick in the computer you want to turn into a Chromebook, boot it up, and install the CloudReady operating system.
3. Booting from the USB stick
This is where things get a little geeky. You’re going to tell your target machine, which is used to booting straight into Windows or MacOS, to instead boot from the USB stick you inserted. My advice would be to insert the USB stick and boot the machine first just to see if it works. If it does, great! Move on to the next step.
If your laptop doesn’t boot into the CloudReady software, don’t get discouraged. You’re going to have to interrupt your machine’s normal boot sequence and instruct it to read the USB stick first. To do that, boot up the machine and, depending on the make of the computer—see the list here—repeatedly tap the corresponding button as it’s booting.
To get better help, do a web search for the make and model of your machine plus “boot from USB.” I googled “Asus Zenbook boot from USB” and got a list of articles that not only told me how to access the boot settings menus—also known as the BIOS settings—but how to configure it to read the USB stick upon startup. Follow the steps here if you get stuck.
4. Install CloudReady
If you’ve made it to this step, congrats! The hard parts are over.
Once your machine boots from the USB stick you created, you’ll get a sluggish version of Chromium running directly via USB. If you get cold feet at this point, simply reboot the computer without the USB stick inserted and it’ll go back to whatever it was running previously.
If you’re ready to permanently install CloudReady, click your way through the initial screens—you’ll set your network and log in to your Google account—and then click the clock icon in the lower-right corner and select the “Install OS” icon.

At this point, you’ll have a couple more chances to change your mind. “Did you do a backup? You know this erases all your stuff, right?” Once you’ve committed, click the big blue “Erase hard drive & install CloudReady” button to light this candle.
You’ll then stare at this screen for a while—again, about 20 minutes.
Once that’s done, the machine will shut down. It’s a bit unnerving: I kind of expected it to just reboot. Simply remove the USB stick, start up the computer, and enjoy your “new” Chromebook.
Recognize your brand’s excellence by applying to this year’s Brands That Matter Awards before the early-rate deadline, May 3.
